Text Field
Text Fields let users enter and edit text.
Text fields allow users to enter text into a UI. They typically appear in forms and dialogs.
Basic TextField
The TextField wrapper component is a complete form control including a label, input, and help text.
It comes with three variants: outlined (default), filled, and standard.
Form props
Standard form attributes are supported, for example required, disabled, type, etc. as well as a helperText which is used to give context about a field's input, such as how the input will be used.
Controlling the HTML input
Use slotProps.htmlInput to pass attributes to the underlying <input> element.
<TextField slotProps={{ htmlInput: { 'data-testid': '…' } }} />
The rendered HTML input will look like this:
<input
  aria-invalid="false"
  class="MuiInputBase-input MuiOutlinedInput-input"
  type="text"
  data-testid="…"
/>
Validation
The error prop toggles the error state.
The helperText prop can then be used to provide feedback to the user about the error.
Multiline
The multiline prop transforms the Text Field into a Textarea Autosize element.
Unless the rows prop is set, the height of the text field dynamically matches its content.
You can use the minRows and maxRows props to bound it.
Icons
There are multiple ways to display an icon with a text field.
Input Adornments
The main way is with an InputAdornment.
This can be used to add a prefix, a suffix, or an action to an input.
For instance, you can use an icon button to hide or reveal the password.
kg
kg
Weight
$
kg
kg
Weight
$
kg
kg
$
Customizing adornments
You can apply custom styles to adornments, and trigger changes to one based on attributes from another.
For example, the demo below uses the label's [data-shrink=true] attribute to make the suffix visible (via opacity) when the label is in its shrunken state.
Sizes
Fancy smaller inputs? Use the size prop.
The filled variant input height can be further reduced by rendering the label outside of it.
Margin
The margin prop can be used to alter the vertical spacing of the text field.
Using none (default) doesn't apply margins to the FormControl whereas dense and normal do.
Full width
fullWidth can be used to make the input take up the full width of its container.
Uncontrolled vs. Controlled
The component can be controlled or uncontrolled.
Components
TextField is composed of smaller components (
FormControl,
Input,
FilledInput,
InputLabel,
OutlinedInput,
and FormHelperText
) that you can leverage directly to significantly customize your form inputs.
You might also have noticed that some native HTML input properties are missing from the TextField component.
This is on purpose.
The component takes care of the most used properties.
Then, it's up to the user to use the underlying component shown in the following demo. Still, you can use slotProps.htmlInput (and slotProps.input, slotProps.inputLabel properties) if you want to avoid some boilerplate.
Color
The color prop changes the highlight color of the text field when focused.
Customization
Here are some examples of customizing the component. You can learn more about this in the overrides documentation page.
Using the styled API
Using the theme style overrides API
Use the styleOverrides key to change any style injected by Material UI into the DOM.
See the theme style overrides documentation for further details.
Customization does not stop at CSS.
You can use composition to build custom components and give your app a unique feel.
Below is an example using the InputBase component, inspired by Google Maps.
🎨 If you are looking for inspiration, you can check MUI Treasury's customization examples.
useFormControl
For advanced customization use cases, a useFormControl() hook is exposed.
This hook returns the context value of the parent FormControl component.
API
import { useFormControl } from '@mui/material/FormControl';
Returns
value (object):
value.adornedStart(bool): Indicate whether the childInputorSelectcomponent has a start adornment.value.setAdornedStart(func): Setter function foradornedStartstate value.value.color(string): The theme color is being used, inherited fromFormControlcolorprop .value.disabled(bool): Indicate whether the component is being displayed in a disabled state, inherited fromFormControldisabledprop.value.error(bool): Indicate whether the component is being displayed in an error state, inherited fromFormControlerrorpropvalue.filled(bool): Indicate whether input is filledvalue.focused(bool): Indicate whether the component and its children are being displayed in a focused statevalue.fullWidth(bool): Indicate whether the component is taking up the full width of its container, inherited fromFormControlfullWidthpropvalue.hiddenLabel(bool): Indicate whether the label is being hidden, inherited fromFormControlhiddenLabelpropvalue.required(bool): Indicate whether the label is indicating that the input is required input, inherited from theFormControlrequiredpropvalue.size(string): The size of the component, inherited from theFormControlsizepropvalue.variant(string): The variant is being used by theFormControlcomponent and its children, inherited fromFormControlvariantpropvalue.onBlur(func): Should be called when the input is blurredvalue.onFocus(func): Should be called when the input is focusedvalue.onEmpty(func): Should be called when the input is emptiedvalue.onFilled(func): Should be called when the input is filled
Example
Performance
Global styles for the auto-fill keyframes are injected and removed on each mount and unmount, respectively.
If you are loading a large number of Text Field components at once, it might be a good idea to change this default behavior by enabling disableInjectingGlobalStyles in MuiInputBase.
Make sure to inject GlobalStyles for the auto-fill keyframes at the top of your application.
import { GlobalStyles, createTheme, ThemeProvider } from '@mui/material';

const theme = createTheme({
  components: {
    MuiInputBase: {
      defaultProps: {
        disableInjectingGlobalStyles: true,
      },
    },
  },
});

export default function App() {
  return (
    <ThemeProvider theme={theme}>
      <GlobalStyles
        styles={{
          '@keyframes mui-auto-fill': { from: { animationName: 'mui-auto-fill' } },
          '@keyframes mui-auto-fill-cancel': {
            from: { animationName: 'mui-auto-fill-cancel' },
          },
        }}
      />
      ...
    </ThemeProvider>
  );
}
Limitations
Shrink
The input label "shrink" state isn't always correct. The input label is supposed to shrink as soon as the input is displaying something. In some circumstances, we can't determine the "shrink" state (datetime input, Stripe input). You might notice an overlap.
To workaround the issue, you can force the "shrink" state of the label.
<TextField slotProps={{ inputLabel: { shrink: true } }} />
or
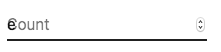
<InputLabel shrink>Count</InputLabel>
Floating label
The floating label is absolutely positioned. It won't impact the layout of the page. Make sure that the input is larger than the label to display correctly.
type="number"
If you need a text field with number validation, you can use Number Field instead.
Helper text
The helper text prop affects the height of the text field. If two text fields are placed side by side, one with a helper text and one without, they will have different heights. For example:
Please enter your name
This can be fixed by passing a space character to the helperText prop:
Please enter your name
Integration with 3rd party input libraries
You can use third-party libraries to format an input.
You have to provide a custom implementation of the <input> element with the inputComponent property.
The following demo uses the react-imask and react-number-format libraries. The same concept could be applied to, for example react-stripe-element.
The provided input component should expose a ref with a value that implements the following interface:
interface InputElement {
  focus(): void;
  value?: string;
}
const MyInputComponent = React.forwardRef((props, ref) => {
  const { component: Component, ...other } = props;

  // implement `InputElement` interface
  React.useImperativeHandle(ref, () => ({
    focus: () => {
      // logic to focus the rendered component from 3rd party belongs here
    },
    // hiding the value e.g. react-stripe-elements
  }));

  // `Component` will be your `SomeThirdPartyComponent` from below
  return <Component {...other} />;
});

// usage
<TextField
  slotProps={{
    input: {
      inputComponent: MyInputComponent,
      inputProps: {
        component: SomeThirdPartyComponent,
      },
    },
  }}
/>;
Accessibility
In order for the text field to be accessible, the input should be linked to the label and the helper text. The underlying DOM nodes should have this structure:
<div class="form-control">
  <label for="my-input">Email address</label>
  <input id="my-input" aria-describedby="my-helper-text" />
  <span id="my-helper-text">We'll never share your email.</span>
</div>
- If you are using the
TextFieldcomponent, you just have to provide a uniqueidunless you're using theTextFieldonly client-side. Until the UI is hydratedTextFieldwithout an explicitidwill not have associated labels. - If you are composing the component:
<FormControl>
  <InputLabel htmlFor="my-input">Email address</InputLabel>
  <Input id="my-input" aria-describedby="my-helper-text" />
  <FormHelperText id="my-helper-text">We'll never share your email.</FormHelperText>
</FormControl>
Supplementary projects
For more advanced use cases, you might be able to take advantage of:
- react-hook-form-mui: Material UI and react-hook-form combined.
- formik-material-ui: Bindings for using Material UI with formik.
- mui-rff: Bindings for using Material UI with React Final Form.
- @ui-schema/ds-material Bindings for using Material UI with UI Schema. JSON Schema compatible.
API
See the documentation below for a complete reference to all of the props and classes available to the components mentioned here.