Data providers
Bring tabular data to the frontend with server-side pagination and filtering.
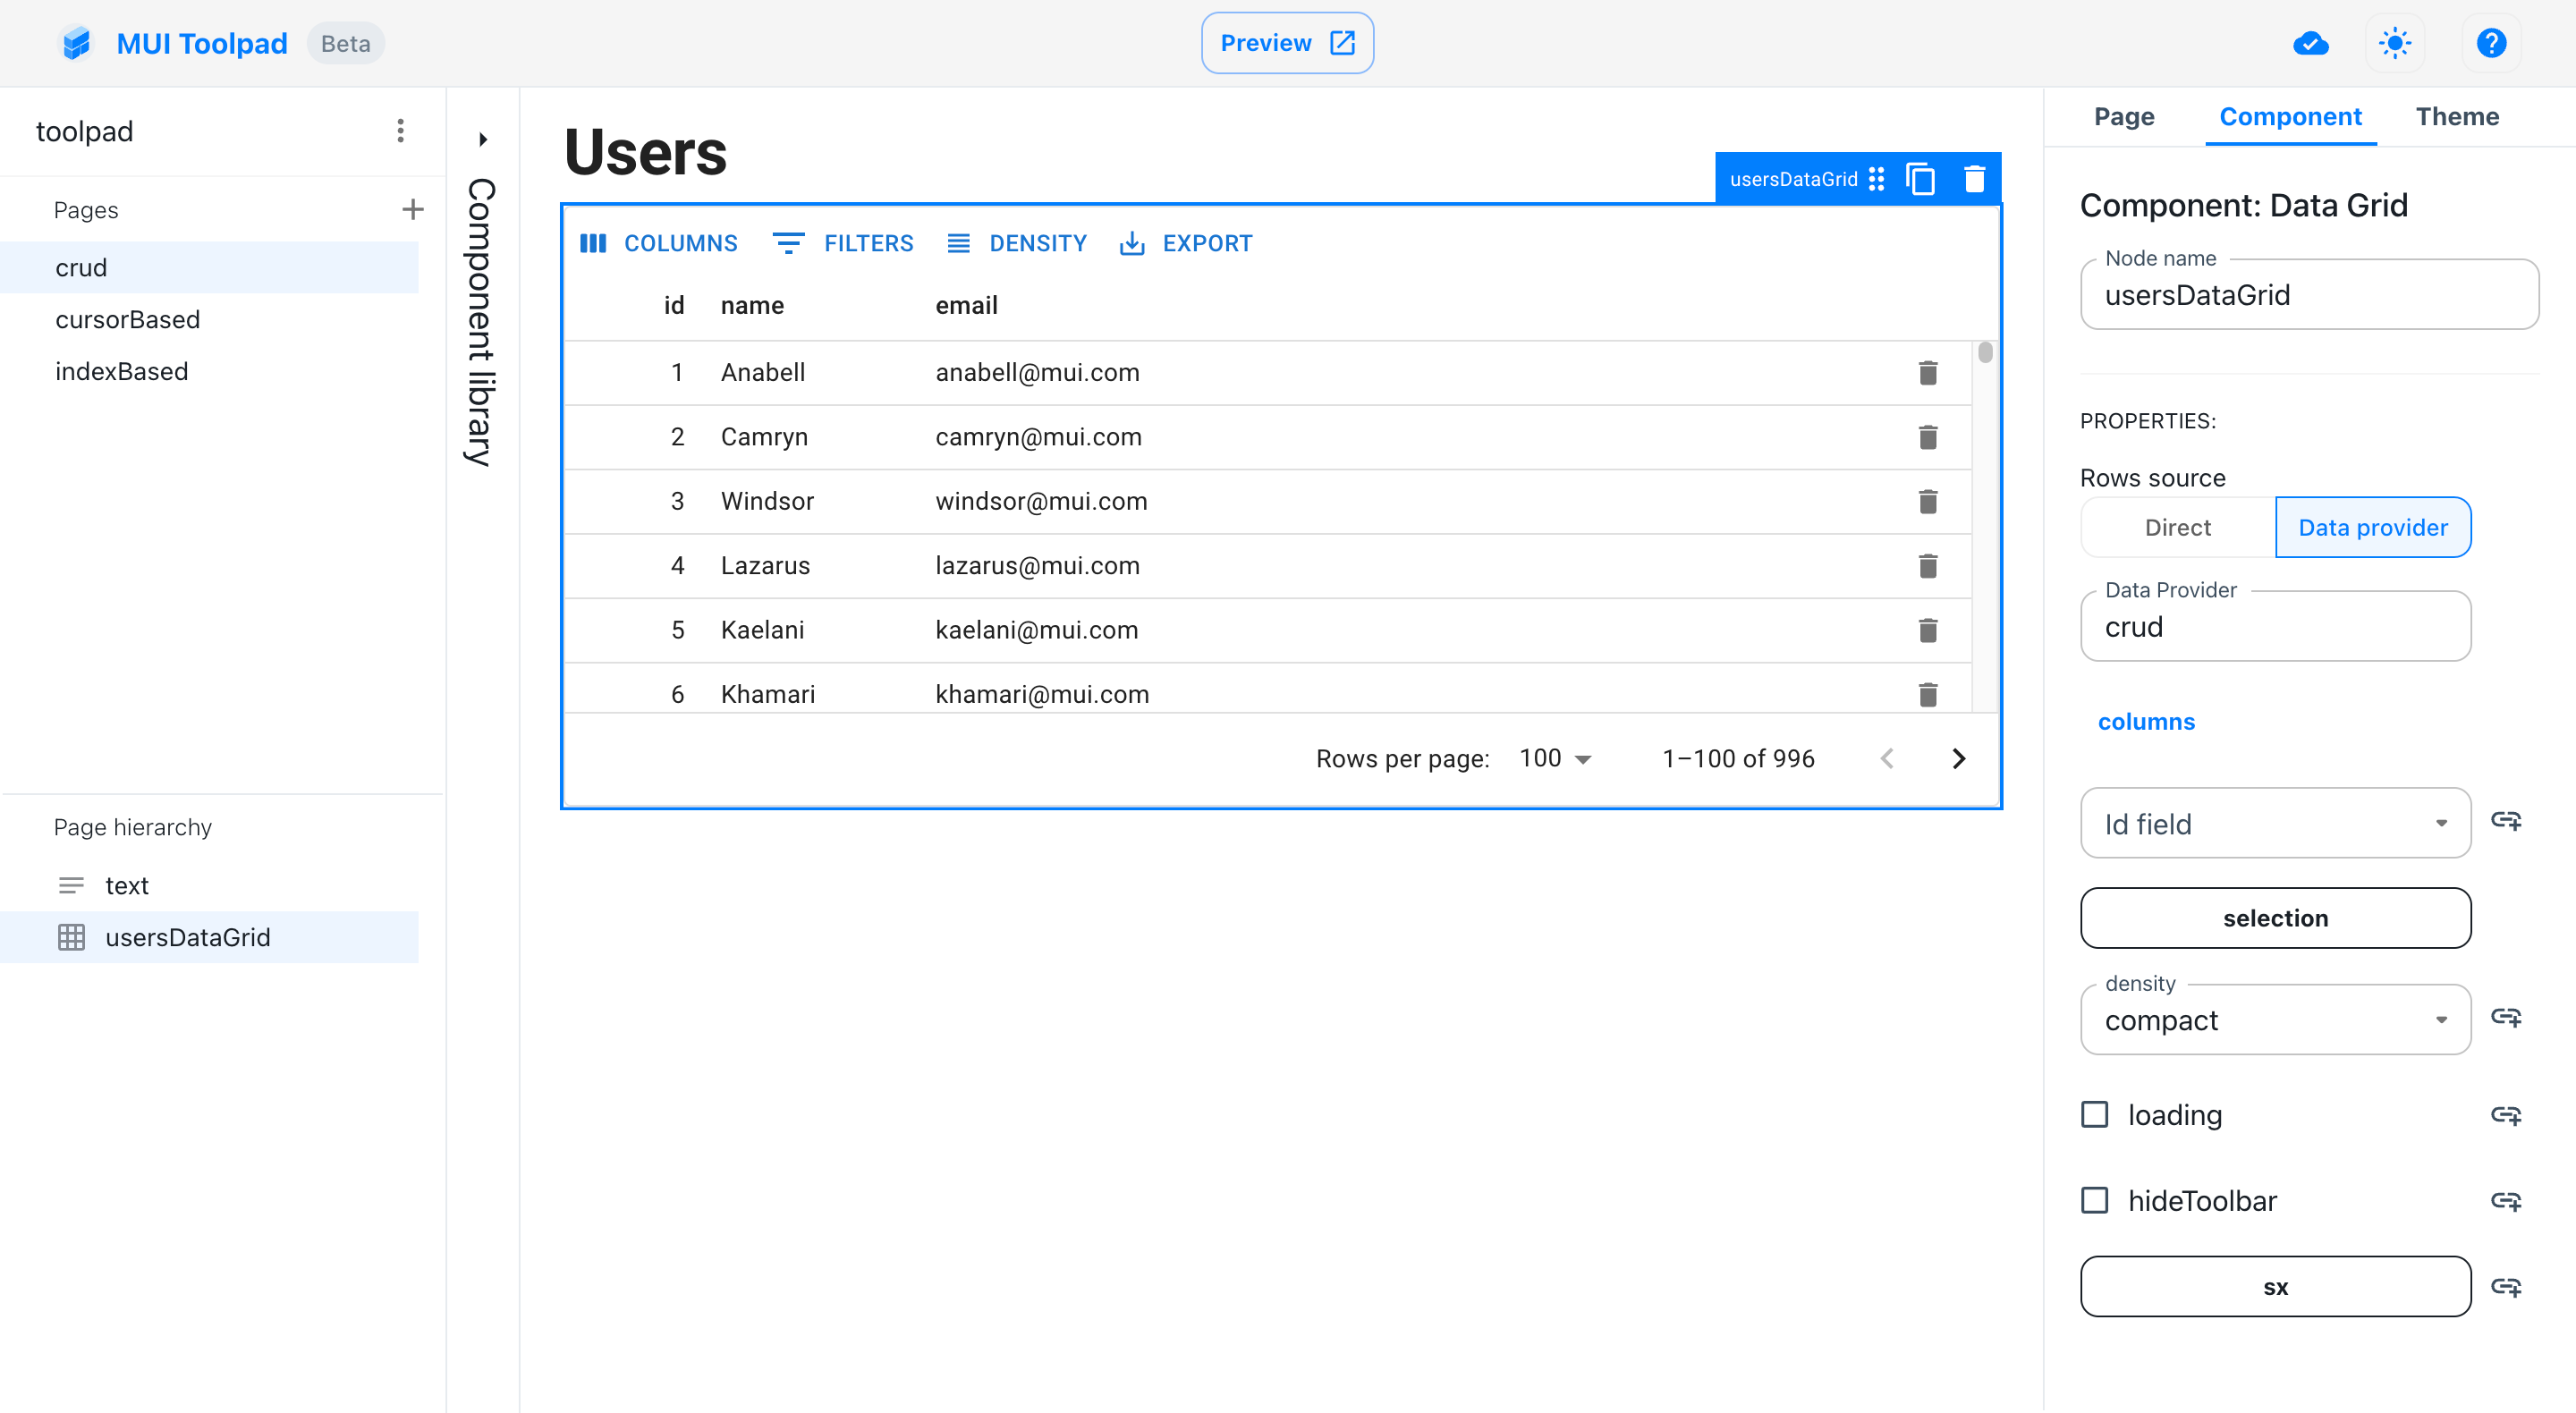
Toolpad Studio functions are great to bring some backend state to the page, but they fall short when it comes to offering pagination and filtering capabilities from the server. Toolpad Studio offers a special construct to enable this use case: Data providers. Data providers abstract server-side collections. They could be database tables, REST APIs, or any data that represents a set of records that share a common interface. Data providers are defined as server-side objects and can be directly connected to a data grid to make it fully interactive.
Follow these steps to create a new data provider:
A data provider that iterates over a static list could look as follows:
import { createDataProvider } from '@toolpad/studio-runtime/server';
import DATA from './movies.json';

export default createDataProvider({
  async getRecords({ paginationModel: { start = 0, pageSize } }) {
    const records = DATA.slice(start, start + pageSize);
    return { records, totalCount: DATA.length };
  },
});
Pagination
The data provider supports two styles of pagination. Index based, and cursor based pagination.
Index based
This is the strategy where your data is paginated by returning data based on a start index and a page size. The getRecords method receives start and pageSize values in its paginationModel parameter and returns a set of records representing the page. Index based pagination is the default but you can explicitly enable this by setting paginationMode to 'index'.
export default createDataProvider({
  paginationMode: 'index',
  async getRecords({ paginationModel: { start = 0, pageSize } }) {
    const { page, totalCount } = await db.getRecords(start, pageSize);
    return {
      records: page,
      totalCount,
    };
  },
});
Cursor based
This is the strategy where your data is paginated by when it returns data based on a cursor and a page size. The getRecords method receives cursor and pageSize values in its paginationModel parameter and returns a set of records representing the page. You indicate the cursor of the next page with a cursor property in the result. Pass null to signal the end of the collection. You can enable Cursor based pagination by setting paginationMode to 'cursor'.
The cursor property of the paginationModel is null when Toolpad Studio fetches the initial page. Any result set returned from the getRecords function must be accompanied with a cursor property, a string which contains a reference to the next page. The cursor parameter in the paginationModel contains this value when fetching the subsequent page. Return null for this value to indicate the end of the sequence.
export default createDataProvider({
  paginationMode: 'cursor',
  async getRecords({ paginationModel: { cursor = null, pageSize } }) {
    const { page, nextPageCursor, totalCount } = await db.getRecords(
      cursor,
      pageSize,
    );
    return {
      records: page,
      cursor: nextPageCursor,
      totalCount,
    };
  },
});
Filtering
Toolpad Studio data sources support server-side filtering. You can implement a server-side filter by reading the filterModel property that is passed to the getRecords function. This model contains an items property and a logicOperator. By combining them you can achieve complex serverside filters.
export default createDataProvider({
  async getRecords({ filterModel }) {
    console.log(filterModel);
  },
});
For example, this could print the following if the corresponding column filters were applied in the data grid:
{
  logicOperator: 'and',
  items: [
    { field: 'first_name', operator: 'startsWith', value: 'L' },
    { field: 'last_name', operator: 'equals', value: 'Skywalker' },
  ]
}
Now the backend function receives the grid filter from the UI in its parameters.
Uncheck the column option "filterable" if you want to disable filtering for a certain column:
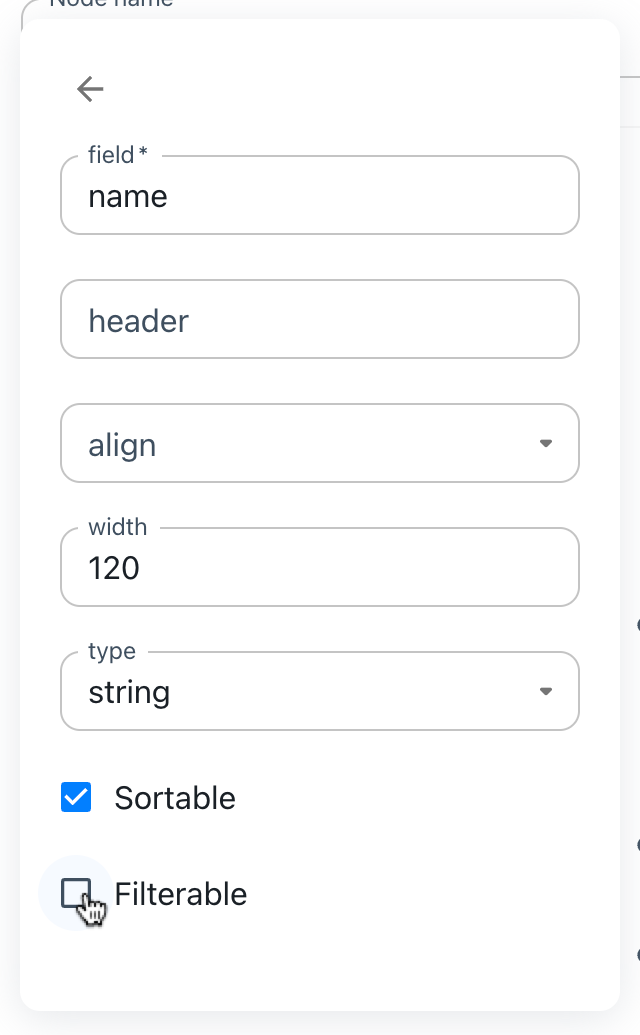
Disable filterable
Sorting
Toolpad Studio data sources support server-side sorting. To achieve this you'll have to consume the sortModel property that is passed to the getRecords method:
export default createDataProvider({
  async getRecords({ sortModel }) {
    console.log(sortModel);
  },
});
Depending on which column has been set to sort by, this results in:
[{ field: 'name', sort: 'asc' }];
Now the backend function receives the grid sorting model from the UI in its parameters.
Uncheck the column option "sortable" if you want to disable sorting for a certain column:
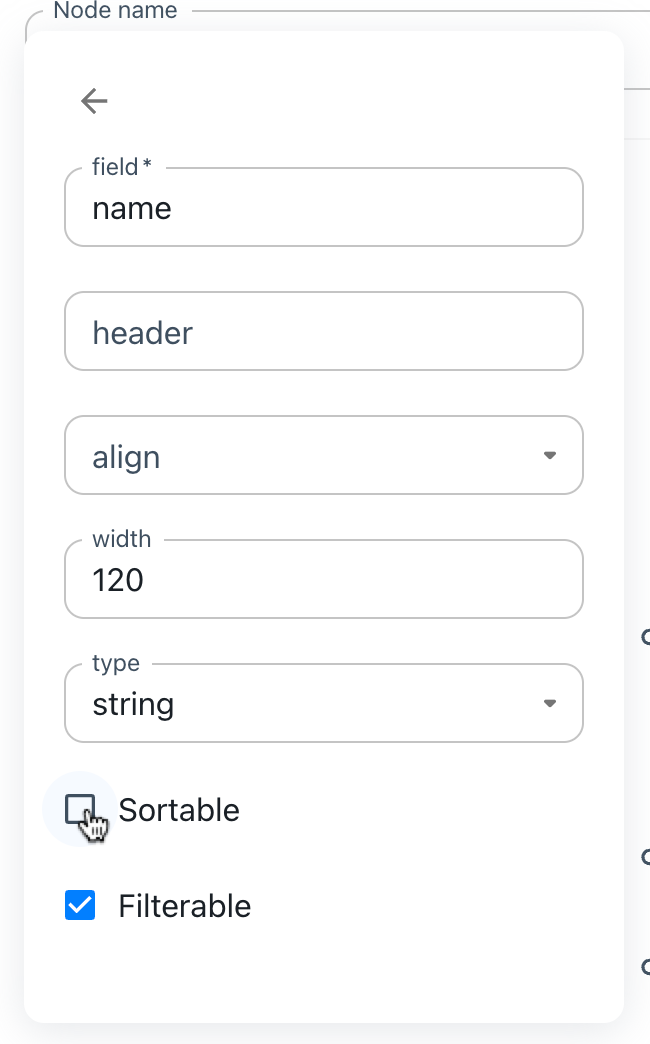
Disable sortable
Row editing
The data provider can be extended to automatically support row editing. To enable this, you'll have to add a updateRecord method to the data provider interface that accepts the id of the row that is to be edited, and an object containing all the updated fields from the row editing operation.
export default createDataProvider({
  async getRecords() {
    return prisma.users.findMany();
  },

  async updateRecord(id, data) {
    return prisma.users.update({ where: { id }, data });
  },
});
When this method is available in the data provider, each row gets an edit button. This edit button brings the row in edit mode. To commit the changes press the save button on the row that is in edit mode. To discard the changes use the cancel button.
You can disable the editing functionality for specific columns by unchecking the Editable option in the column definition.
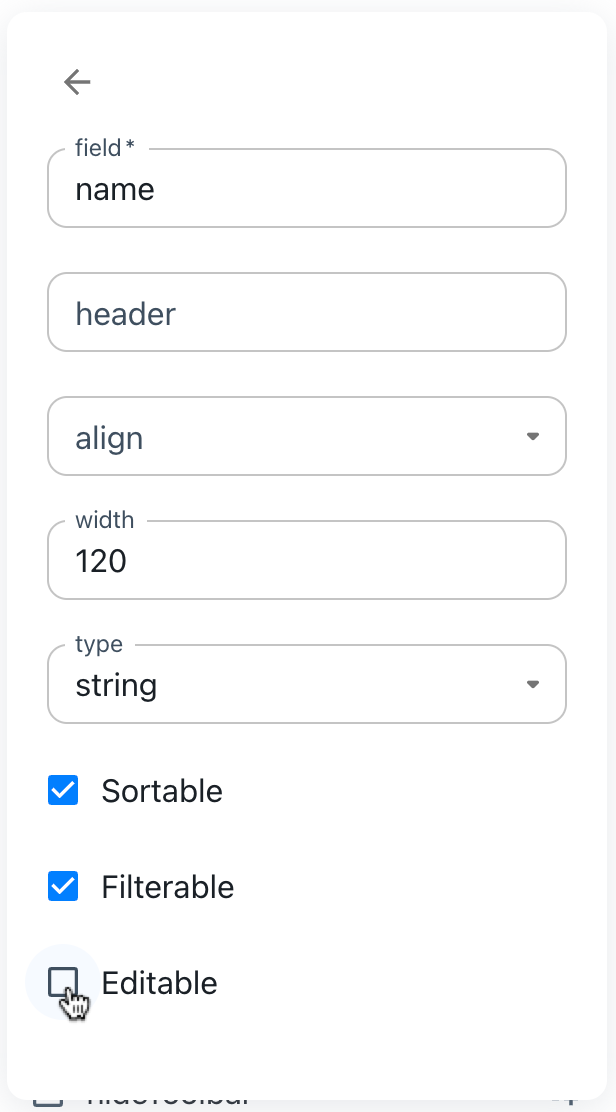
Disable editable
Row creation
The data provider can be extended to support creating new rows. To enable this, you have to add a createRecord method to the data provider interface. This method receives an object with all values provided by the user in the creation UI.
export default createDataProvider({
  async getRecords() {
    return prisma.users.findMany();
  },

  async createRecord(data) {
    return prisma.users.create({ data });
  },
});
After you make this method available in the data provider, an "Add record" button appears in the data grid toolbar. Click this button and a new editable row appears at the top of the grid. Fill in the values and click the "Save" button to finish creating the row. You'll have to return the newly created row from the createRecord method so that the grid can update accordingly.
Deleting rows
The data provider can be extended to automatically support row deletion. To enable this, you'll have to add a deleteRecord method to the data provider interface that accepts the id of the row that is to be deleted.
export default createDataProvider({
  async getRecords({ paginationModel: { start = 0, pageSize } }) {
    return db.query(`SELECT * FROM users`);
  },

  async deleteRecord(id) {
    await db.query(`DELETE FROM users WHERE id = ?`, [id]);
  },
});
When a data provider contains a deleteRecord method, each row has a delete button. When the user clicks that delete button, the delete method gets called with the id of that row and after successful deletion, the data is reloaded.
Delete action in data provider
API
See the documentation below for a complete reference to all of the functions and interfaces mentioned in this page.